Lorem ipsum dolor

Sit amet

Consectetur adipiscing
Ut nec lobortis
Curabitur luctus
Pulvinar tincidunt
Description
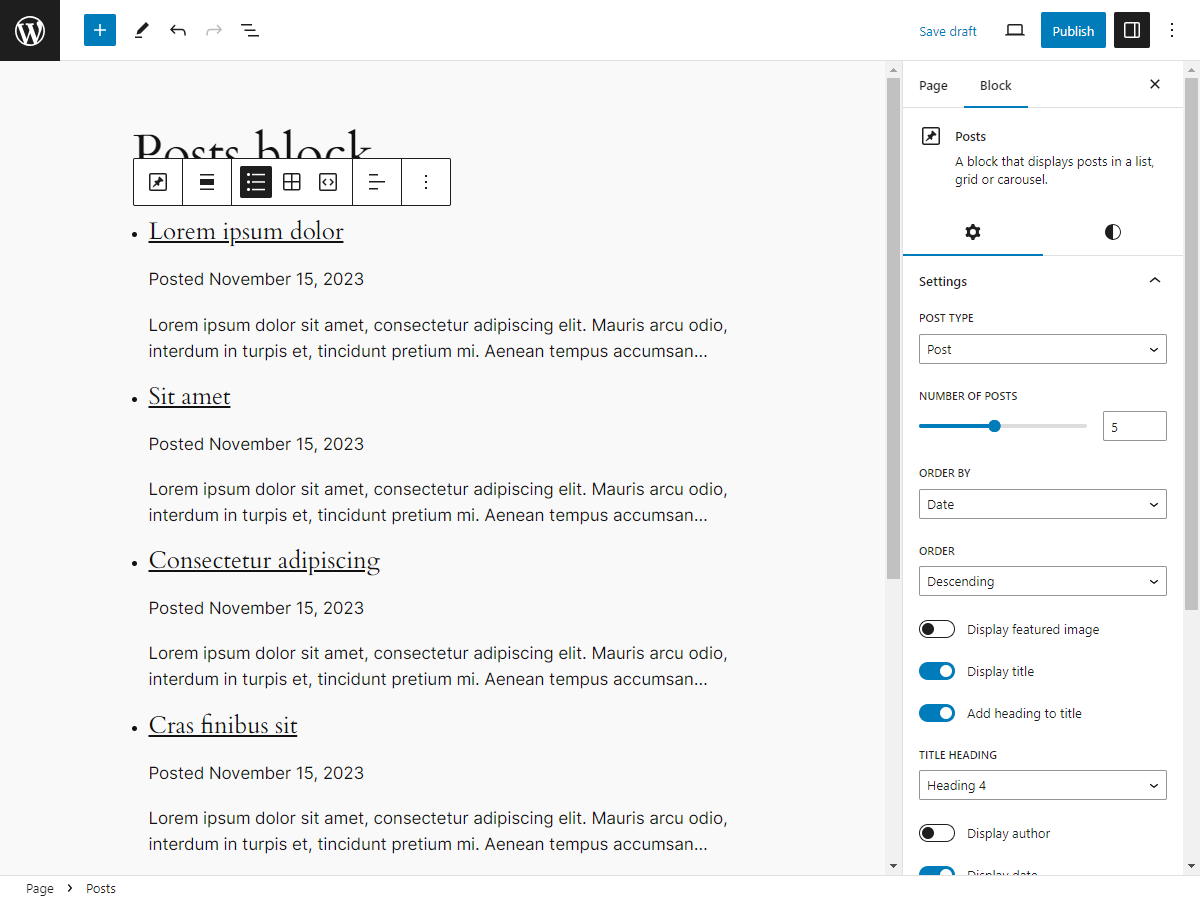
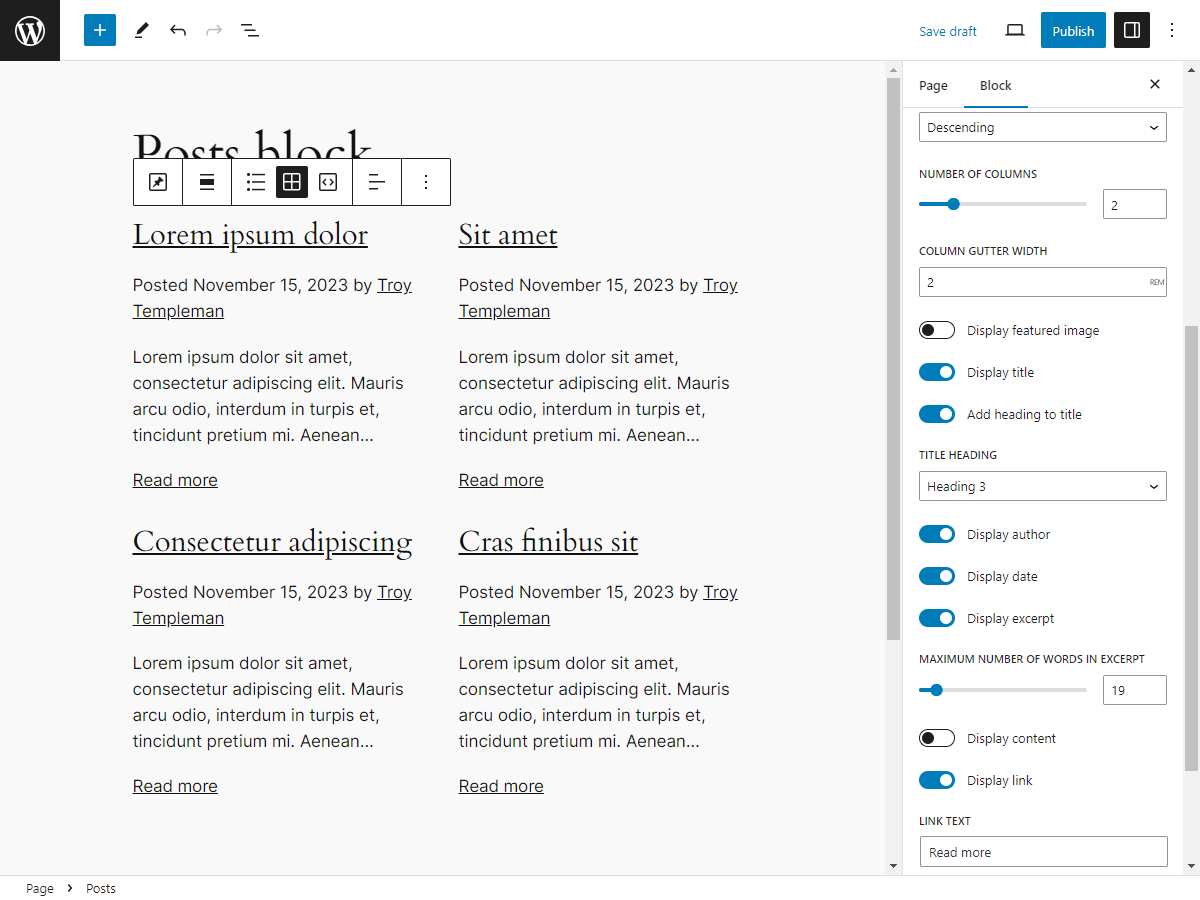
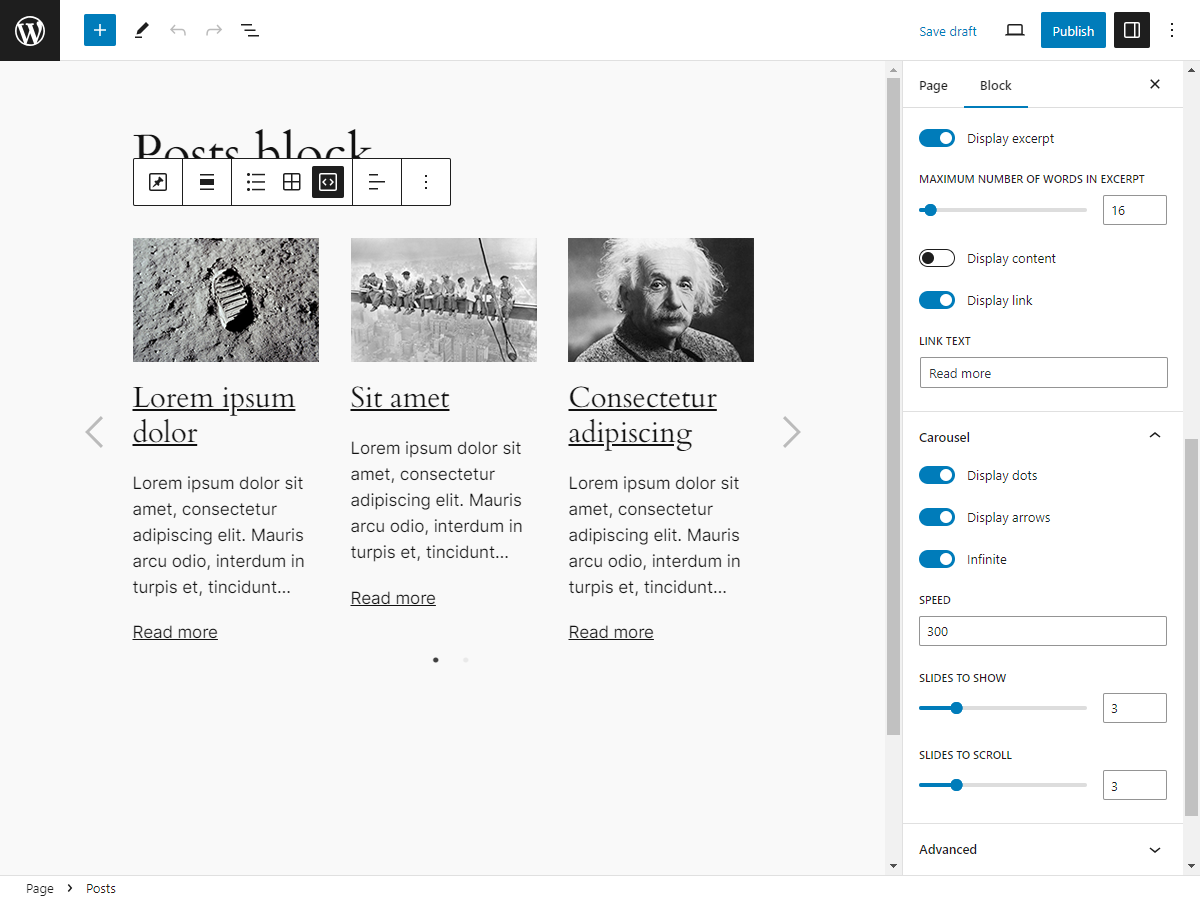
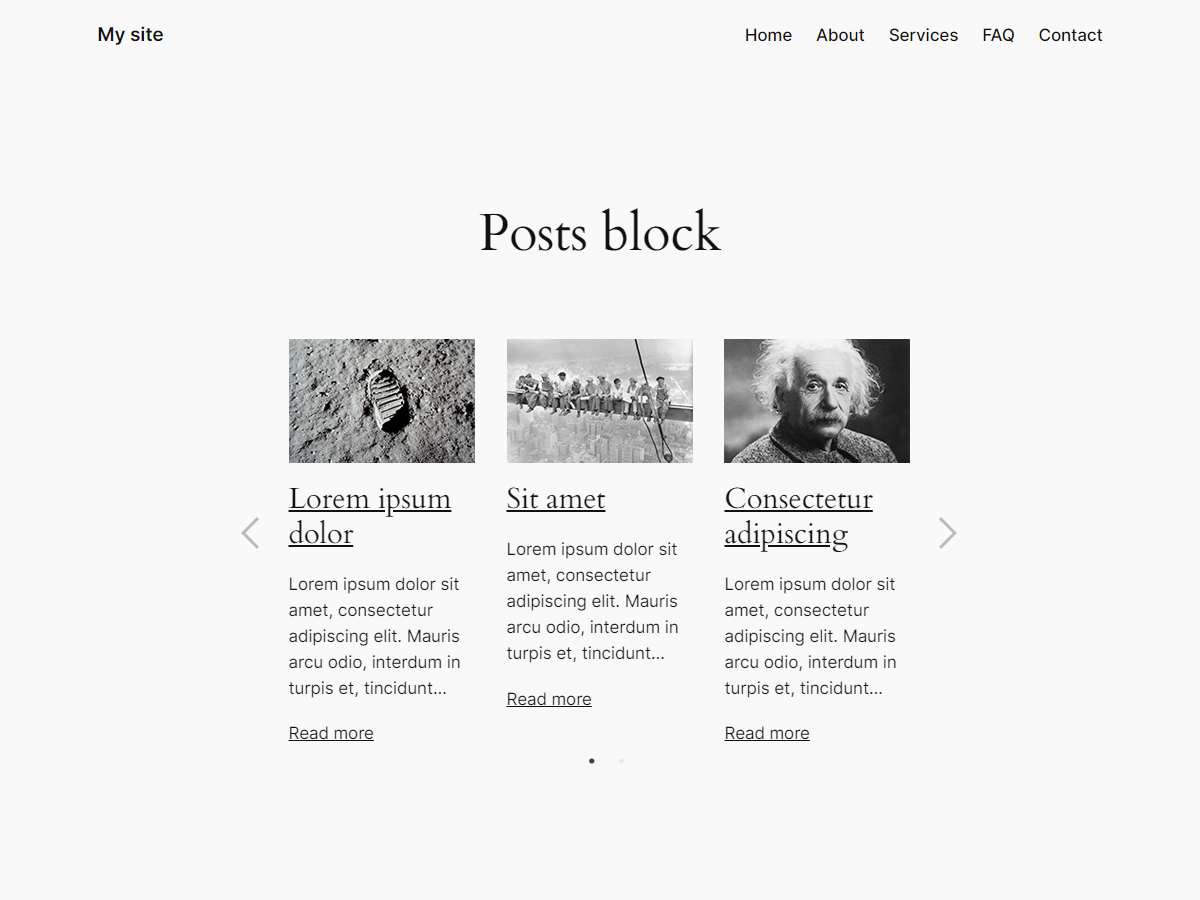
Posts Block adds a responsive Posts block to the block editor inserter that can be added to display posts in a list, grid or carousel.
Features
- Responsive
- Settings
- Block alignment
- Layout
- List
- Grid
- Carousel
- Text alignment
- Post type [Pro]
- Number of posts
- Order by
- Order
- Number of columns
- Column gutter width
- Display featured image
- Display title
- Add heading to title
- Title heading
- Display author
- Display date
- Display excerpt
- Maximum number of words in excerpt
- Display content
- Display link
- Link text
- Carousel
- Display dots
- Display arrows
- Infinite
- Speed
- Slides to show
- Slides to scroll
- Styles
- Color
- Text
- Background
- Link
- Carousel dots [Pro]
- Carousel dots hover [Pro]
- Carousel arrows [Pro]
- Carousel arrows hover [Pro]
- Typography
- Font family
- Font size
- Appearance
- Line height
- Letter spacing
- Text decoration
- Letter case
- Dimensions
- Padding
- Margin
- List post padding [Pro]
- List post margin [Pro]
- Grid post padding [Pro]
- Grid post margin [Pro]
- Carousel post padding [Pro]
- Carousel post margin [Pro]
- Featured image padding [Pro]
- Featured image margin [Pro]
- Title padding [Pro]
- Title margin [Pro]
- Meta padding [Pro]
- Meta margin [Pro]
- Excerpt padding [Pro]
- Excerpt margin [Pro]
- Content padding [Pro]
- Content margin [Pro]
- Link padding [Pro]
- Link margin [Pro]
- Color
- Variations [Pro]
- List [Pro]
- Grid [Pro]
- Carousel [Pro]
HTML
Posts Block will output a Posts block with the following HTML structure:
<ul class="wp-block-tt-posts wp-block-tt-posts-6">
    <li class="wp-block-tt-posts-post">
        <div class="wp-block-tt-posts-post-featured-image”>
            <img class=“wp-block-tt-posts-post-thumbnail” src=“#”>
        </div>
        <h3 class="wp-block-tt-posts-post-title">
            <a href=“#”>Title</a>
        </h3>
        <div class="wp-block-tt-posts-post-meta">
            <span class="wp-block-tt-posts-post-meta-date">Posted <time class="wp-block-tt-posts-post-meta-date-time" datetime="2023-11-01T12:00:00+00:00">November 1, 2023</time></span>
        </div>
        <div class="wp-block-tt-posts-post-excerpt">Excerpt</div>
        <a class="wp-block-tt-posts-post-link" href=“#”>Read more</a>
    </li>
</ul>
Support
If you need help with Posts Block, please submit a ticket on the Support forum.
Donate
If you like Posts Block and would like to support it’s future development, how about buying me a coffee?
Contribute
If you would like to contribute to the development of Posts Block, the repository is located on GitHub.
License
Posts Block is released under the GNU General Public License, version 2 (GPLv2).
Requirements
- WordPress 6.0 or greater
- PHP version 7.4 or greater
- MySQL version 5.7 or greater or MariaDB version 10.3 or greater.
Installation
Posts Block can be installed in one of the following three ways:
Upload
To install with a .zip file:
- Login to your WordPress site at domain.com/wp-admin, where domain.com is the domain of your WordPress site.
- On the Dashboard page, in the left menu, click Plugins.
- On the Plugins page, click Add New Plugin.
- On the Add Plugins page, click Upload Plugin.
- Click Choose File, locate the .zip file and click Open.
- Click Install Now.
- On the Installing Plugin from uploaded file page, click Activate.
Manual
To install with a SFTP client:
- If you have a .zip file, unzip it with archiving software such as WinZip or Archive Utility.
- In a SFTP client such as WinSCP or FileZilla, connect to your WordPress site directory on your server.
- In the unzipped files, copy the posts-block folder and paste on your server, in your site’s wp-content/plugins folder.
- Login to your WordPress site at domain.com/wp-admin, where domain.com is the domain of your WordPress site.
- On the Dashboard page, in the left menu, click Plugins.
- On the Plugins page, locate Posts Block and click Activate.
Theme
To install in your theme instead of a plugin:
- If you have a .zip file, unzip it with archiving software such as WinZip or Archive Utility.
- In the unzipped files, copy the posts-block folder and paste in your site’s theme folder, such as wp-content/themes/your-theme/inc/posts-block/, where your-theme is your theme folder.
- In a code editor such as Visual Studio Code or Notepad++, open your theme’s functions.php file.
- In your functions.php file, add the path from Step 2, such as require get_stylesheet_directory() . ‘/inc/posts-block/posts-block.php’;.
- Save and close your functions.php file.
FAQ
What are posts?
Posts are dynamic and time-based content typically used for blogs, news, events, etc. Posts are usually listed in reverse chronological order, can be tagged, categorized and commented on.
How do I install Posts Block?
Please see Installation section.
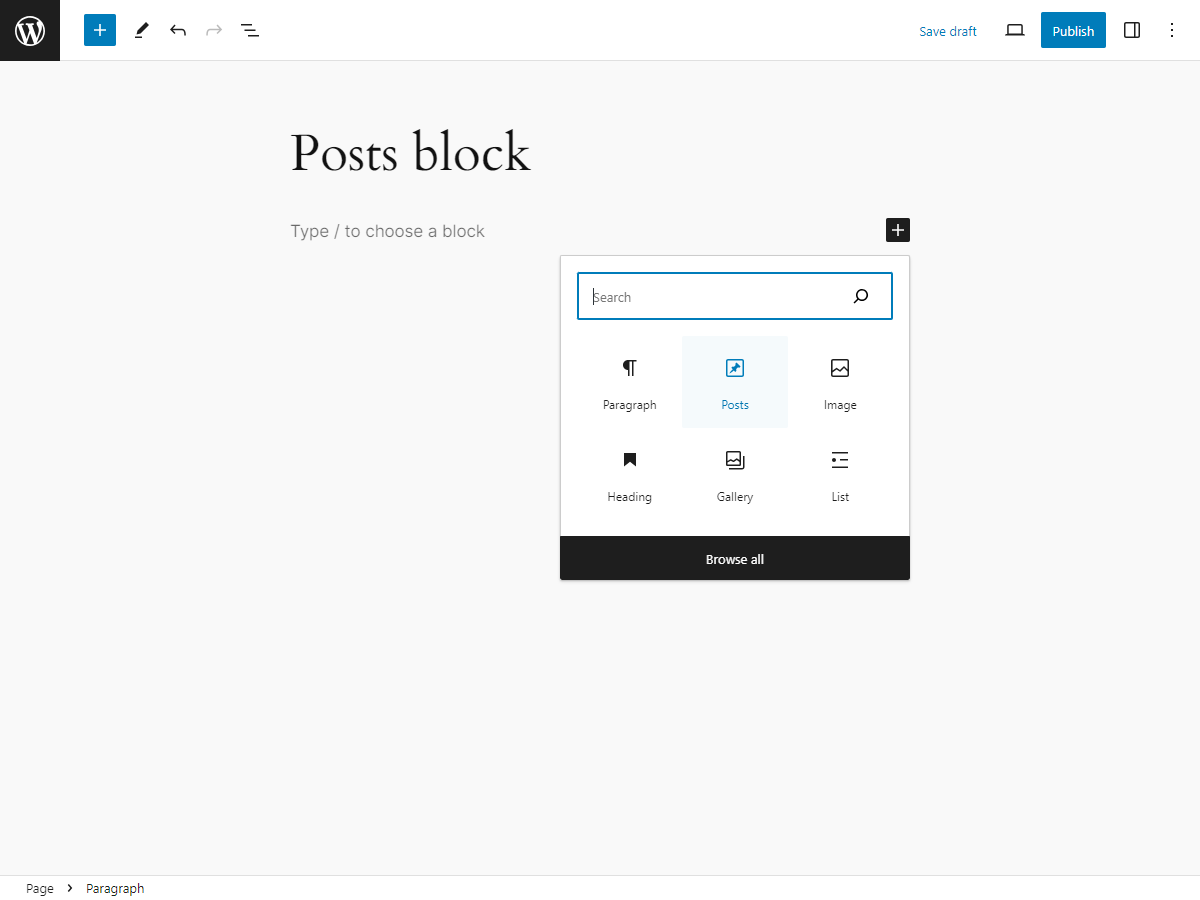
How do I add a Posts block?
- Login to your WordPress site at domain.com/wp-admin, where domain.com is the domain of your WordPress site.
- On the Dashboard page, in the left menu, click Posts or Pages.
- On the Posts or Pages page, either click Add New, search for and/or click the desired post or page title.
- In the block editor, either:
- Click the block inserter + icon in the top toolbar
- Click the block inserter + icon to the right of an empty block, or
- Click the block inserter + icon between blocks
- In the block inserter pop-up modal window, search for and/or click Posts to add a Posts block.
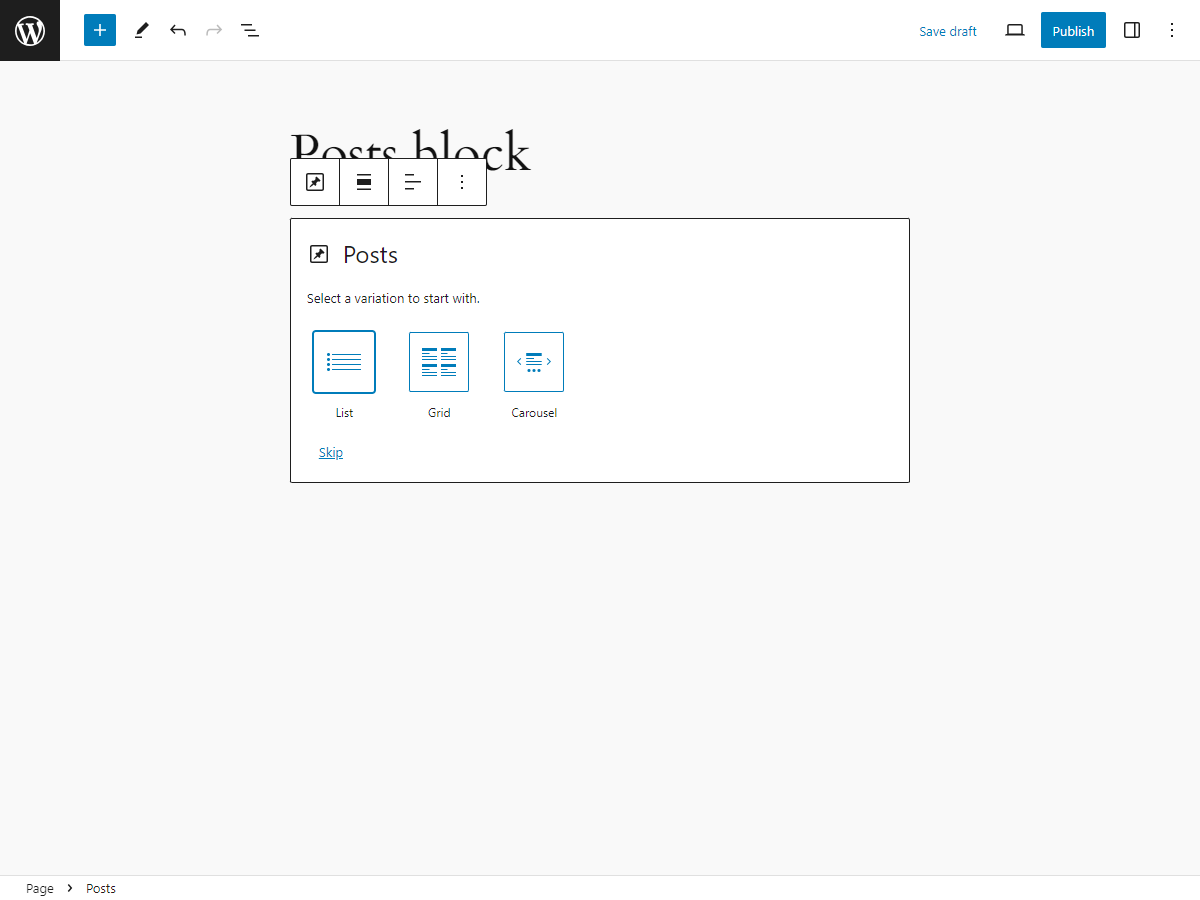
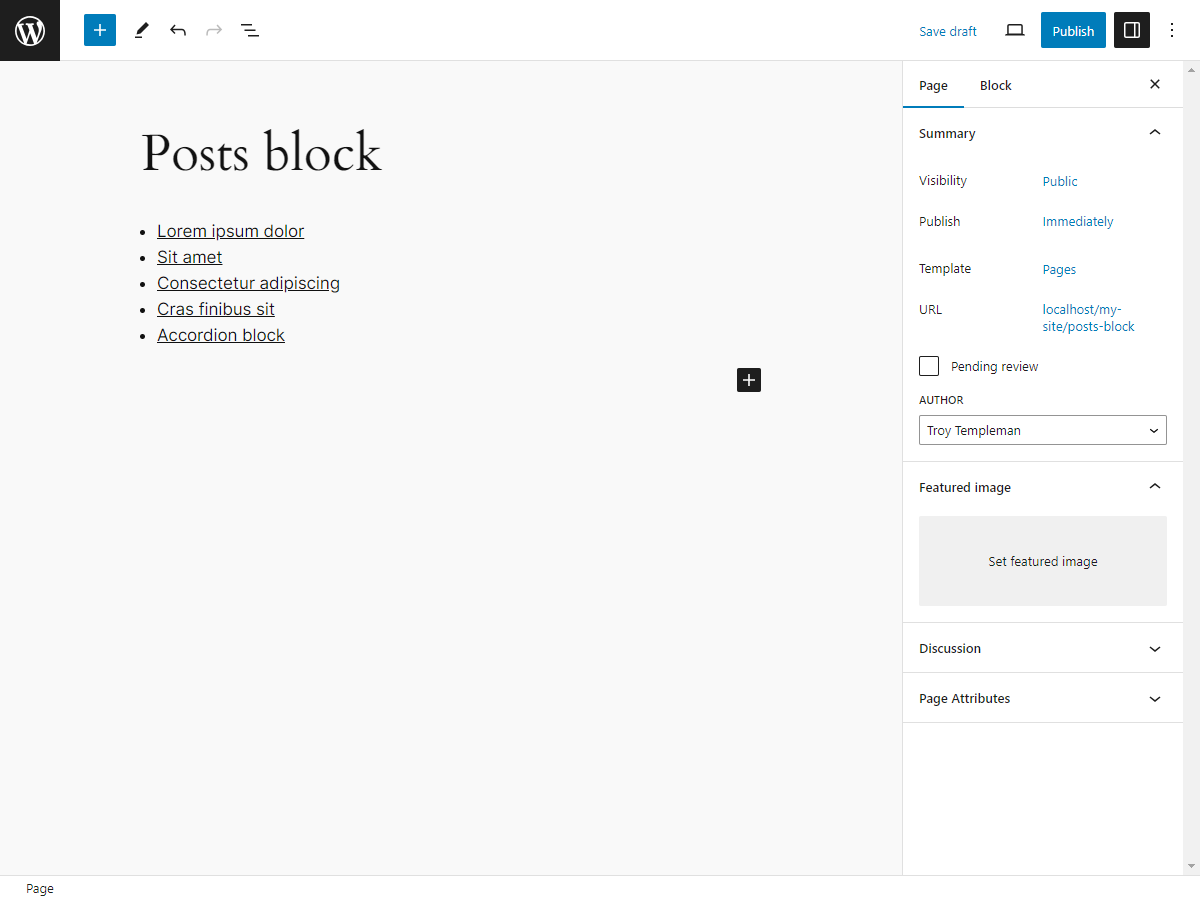
How do I edit a Posts block?
- Login to your WordPress site at domain.com/wp-admin, where domain.com is the domain of your WordPress site.
- On the Dashboard page, in the left menu, click Posts or Pages.
- On the Posts or Pages page, search for and/or click the desired post or page title.
- In the block editor, click the desired Posts block.
- In the block toolbar above, select the desired block alignment, layout, text formatting and/or other options.
- In the settings sidebar, in the Block tab:
- In the Settings tab, select the desired settings.
- In the Styles tab, select the desired Color, Typography and/or Dimensions settings.
How do I setup a development environment?
- Install WordPress on a local server such as Local, Docker, MAMP or XAMPP.
- To install Posts Block on your local site, see Installation section.
- If node.js is not already installed locally, go to https://nodejs.org/ to install.
- In a Command Line Interface (CLI) such as Command Prompt or Terminal, navigate to the posts-block folder. For example, cd localhost/your-site/wp-content/plugins/posts-block.
- To install project dependencies, type npm install.
- In the posts-block folder, edit the desired file or files.
- To create or update the production build directory, type npm run build. For other commands, type npm run.
Screenshots
Changelog
0.1.0 – November 15, 2023
- Initial release